*
Today it is our pleasure of adding one of our favorite home cooks to the PussFootOG line up. Please welcome Krista Bilodeau and her amazing home cooked meals. Along with this clasic meal we have a few more recipes coming for Krista so keep your eyes open.
****
Need more food ideas
https://www.pussfoot.com/blogs/food
*
Krista approves
****
Hands down.. The most delish Pot Roast you will ever eat!!!
Looking for a super simple comfort meal that will feed the whole family and leave plenty for leftovers?! Try this amazing slow cooker recipe that is in your crock pot in 5 minutes or less..
*
Today it is our pleasure of adding one of our favorite home cooks to the PussFootOG line up. Please welcome Krista Bilodeau and her amazing home cooked meals. Along with this clasic German meal we have a few more recipes coming for Krista so keep your eyes open.
****
Need more food ideas
https://www.pussfoot.com/blogs/food
*
Ahh the blue water
****
Garlic Mashed Potatoes
Prep time: 40 min
Cost $6
Category: side dish 5-7 people
Today's item, garlic mashed potatoes, beyond easy to make and you and your family are going to love them. I promise that this is super easy and cost effective. If Covid has taught me anything about food, it’s how to push my money to go further. I hope you enjoy it as much as I do.
If you have any questions, comments and or concerns please feel free to reach out and I will be sure to answer as soon as I can..
Do you have a photograph of me in your home yet?
I need love too.
*
Hey
*
Need more food ideas
https://www.pussfoot.com/blogs/food
What do you need
8 - 10 Golden Yukon Potatoes
3 - 4 cloves of Garlic
1 cutting board
1 sharp knife
1 stick butter
1/2 heavy cream
1 teaspoon salt
1 large saucepan
Something fabulous to wear while cooking
*
On PussFoot.com
*
Come on in, im making dinner
*
And We Begin………
1 Wash your giant balls of starch
*
*
2 Peel
*
I said peel fool
*
3 chop them bad boys ¼ chunks - this will help the traders to cook faster
*
Got Ya !!!
*
4 Add to saucepan - I use a dutch oven and cover with water
*
cover just like I said
*
5 Add peeled garlic
*
My Fav
*
6 Add 1 teaspoon salt
7 Add ½ stick of butter
*
Butter makes it better
*
8 Bring to a boil and allow to cook till soft around 15 - 20 min
9 Drain completely
10 Add ½ which of butter - Cut butter into small sections this will help it to melt
11 begin to mash
*
Now Mash
*
12 Continue to mash -Add heavy cream ¼ cup to start - if more is needed you can add more but slowly so you don't make soup
*
Should look like this
*
PS. You can reheat these the next day
Just add a very little water and a 1/4 stick butter
Bam leftovers
*************
Booo yahhh…. You just made some super wicked good mashed potatoes. Dont forget to give this recipe a share and to join @TheFoodieOG on FB.If you messed up well that sucks for you. Just give me a DM and i'll try to figure out where you went wrong in life. XOXO
Hope you had fun and make sure to send me pics of your messy kitchen and the finished product. If you have something you would like me to cook and post please let me know.
Blue skies
Smile, Life is amazing
Brian
Instagram @pussfoot44
Butter Carrots
Prep time 00:25 min
Cost $5
Category: Side dish (4-5 people)
*
Every one love a good Carrot
*
Today's item, Butter Carrots, beyond easy to make and your kids will love them. Getting my kids to eat anything grown out of the ground has been getting better as they get older However, these carrots have always been a staple at our table because everyone loves them - even when they wouldnt eat veggies. This recipe is stupid simple and there is no way you can mess this up, so give them a try and let me know what you think.
If you have any questions, comments and or concerns please feel free to reach out and I will be sure to answer as soon as I can..
Do you have a photograph of me in your home yet?
I need love too.
Need more food ideas
https://www.pussfoot.com/blogs/food
What do you need
10 carrots Size M
1 cutting board
1 sharp knife
½ stick butter
3 cups water
1 teaspoon salt
1 tablespoon brown sugar
1 medium saucepan
Something fabulous to wear while cooking
*
Fabulous !!!!!!!!!
*
And We Begin………
1 Wash your orange sticks of joy
*
Just look at them
*
2 Peel
*
im so proud of these
*
3 chop them bad boys ¼ inch thick - or to your liking
*
Chop Chop Chop
*
4 Add to saucepan
*
Pan Pan
*
5 Add 1 teaspoon salt
*
Really dont add to much or else
*
6 Add 1 Tablespoon of brown goodness sugar
7 Add water - I say 3 cups but you may need more (cover all of the chips)
8 Add ½ stick of butter
9 Bring to a boil
10 Simmer until ¾ of the liquid has reduced.
11 Serve hot
I mistakenly deleted the rest of the pood prep photos. I know im a fool and need to be punished. I will make these again this week and post the photos.
*
Booo yahhh…. You just made some super wicked good carrots and I bet you love them. If you messed up well that sucks for you. Just give me a DM and i'll try to figure out where you went wrong in life. XOXO
Hope you had fun and make sure to send me pics of your messy kitchen and the finished product. If you have something you would like me to cook and post please let me know.
Blue skies
Smile, Life is amazing
Brian
Hot cheesy crab dip
Hot cheesy crab dip
Prep time: 30 min
Cost $10
Category: dip
Today's item, Hot Cheesy Crab dip. One of my all time fav dips. The smell and taste will be sure to turn any party or covid and chill day a good one. Hot crab dip is so much more than a dip it’s southern comfort food and one thing I can tell you from all my travels - southerners do it right. This dip should only cost you around $10 and 30 min to make and is beyond easy to prepare, even my kids have made this before.. Give it a try. What's the worst that could happen, You hate it or have a seafood reaction lol
If you have any questions, comments and or concerns please feel free to reach out and I will be sure to answer as soon as I can..
Do you have a photograph of me in your home yet?
I need love too.
*
*
Need more food ideas
https://www.pussfoot.com/blogs/food
What do you need
1 mixing bowl
1 oven safe bowl or casserole dish
2 cans white crab meat
1/4 cup sour cream
1/4 cup mayo
1 brick of cream cheese
1 back of mixed shredded cheese
2 tablespoons parmesan cheese
2 tablespoons worcestershire
1 teaspoon paprika
1 tablespoon old bay seasoning
1 bag of something to dip (price not included with the dip)
1 something fabulous to wear while cooking
This will do!!
*
And We Begin………
1 Open and place contents of the crab cans in a strainer
*
yum yum Bumble, Bumble Crab?
*
2 Drain well
3 Once drained place in mixing bowl
4 Add soften cream cheese sour cream and mayo to bowl
*
Looks amazing right?
*
5 Gently mix cream cheese and crab
*
All Mixed Up......
6 Add 2 tablespoons of worcestershire. While continuing to mix
*
How do you pronunce this?
*
7 Add your shredded cheese to the mix. (I generally do 3 or 4 good hand full’s)
*
Real Cheese people !!
*
8 Add old bay and mix till combined
*
Smells Freaking amazing already
*
9 Once Mixed you will top with the parmesan cheese (this will form your crust). You can also add paprika at this point for color
*
should look somthign like this
*
10 Bake for 25-30 min at 375. Or until it begins to brown and bubble along the edge of the casserole dish.
*
See that - make yours looks kinda like that
Serve and enjoy
*
Dig in, It's amazing
*
Booo yahhh…. You just made your own cheesy crab dip and I bet it's amazing. If you messed up well that sucks for you. Just give me a DM and i'll try to figure out where you went wrong in life. XOXO
Hope you had fun and make sure to send me pics of your messy kitchen and the finished product. If you have something you would like me to cook and post please let me know.
Blue skies
Smile, Life is amazing
Brian
Hot chilli powder
Hot chilli powder
Prep time 1 days
Cost $5
Category: Spice
What do you need
1 mason jar
20+ hot peppers (I like ghost But you can use any peppers you fancy)
Dehydrator
Food Processor
1 tablespoon Salt
1 par of rubber gloves
1 tight pair of leggings (guys and girls) cause they are boss
1 PussFootOG apron - cause it will help you cook better
*
Im so right.....
*
And We Begin………
Wear Gloves and do not touch your face!!!!!!!!
1 Wash peppers cause you are not a slob
*
so clean
*
2 With a good knife and cutting board slice pepper long ways and place aside (remove stems --DO NOT remove seeds)
*
Im dead serious do not touch your face
*
3 Once all have been cut place in dehydrator (145 deg for 24 hrs)
*
I used three racks
*
4 Check the peppers every 12 hrs. We want the peppers to be completely dry. They should feel like dried leaves you find on your porch in the fall. If you can't figure it out -- i'm really not sure what else to tell ya.
*
All dry and ready for grinding
*
Ok Ready for the fun part.
5 While wearing a glove - Remove dry peppers from the trays and place in a bowl
*
It puts the pepper in the bowl
*
6 Add a few peppers at a time into a food processor on high.
*
Now blend it
*
*You may feel some discomfort if you are sensitive to hot stuff, so try to do this in a well ventilated area.
7 Continue to add small amounts of the peppers until they have all been processed.
8 Add salt
9 Pulse the processor until the blend has become a fine power
*you will have some larger fines but this is ok
10 Place in a mason jar and enjoy
*
How does your nose feel right now ?
*
*Feel free to add curry or garlic powder too, this is your creation so have fun
Caution depending on what peppers you used this might be intense.
*
Bag it up and give it to your friends
*
Blue skies
Smile, Life is amazing
Brian
Brian
]]>Hot Sauce
Prep time 7 days
Cost $5
Category: Condiment
Today's item, Hot Sauce or what some people call the devils ketchup. This is a super easy and inexpensive sauce you can make for yourself with none of the big box preservatives. Don't get all nervous Nancy - if you like spicy, you are going to love this. If you hate spicy please remember that someone you know loves it and it is your duty to make this for them, just give this a try, worst case you and your friend Karen can email me and tell me I was wrong and that this sucks. Or you and your friends will enjoy this and add it to your super secret list of good easy food to make.
If you have any questions, comments and or concerns please feel free to reach out and I will be sure to answer as soon as I can..
Do you have a photograph of me in your home yet?
I need love too.
*
*
Need more food ideas
https://www.pussfoot.com/blogs/food
What do you need
1 mason jar
10 hot peppers, depending on size (I like ghost But you can use any peppers you fancy)
2 cups of white vinegar
6 Cloves of fresh garlic
1 Carrot - not necessary but I love them
½ Cup Salt
2 tablespoons sugar
1 par of rubber gloves
1 tight pair of leggings (guys and girls) cause they are boss
1 PussFootOG apron - cause it will help you cook better
*
Im so right.....
*
And We Begin………
Wear Gloves and do not touch your face
1 Wash peppers cause you are not a slob
2 With a good knife and cutting board slice pepper long ways
*
Im dead serious do not touch your face
*
3 Place peppers in jar
*
gives me goosebumps
*
4 Peel garlic and add to the jar
*
Jar and Garlic cause I said so
*
5 Add salt to jar
6 Add 2 tablespoons of sugar
7 Add Vinegar to the jar (you may not need the full two cups. This should be ¾ of the way full.
8 Fill the rest of the jar with cool water
9 Seal the jar and give it a good shake
*
I know im lacking on photos
*
* If you want a fun snack you will add cut up carrots to the mix. Place on the top of the peppers and garlic. These will absorb the hot oil and become little super hot and crunchy treats.
10 Let sit in a cool location for at least 4 but no more than 7 days. If you have them in the fridge 7 is recommended. You will need to open the jar to allow some of the gas to escape (no it won't explode, but the jar will become super hard to open unless you let the gas out)
Ok Ready for the fun part.
11 Remove the liquid from the jar DO NOT DISCARD. I pour mine into a solo cup.
*
If you like my body and you you think im sexy
*
*If you added carrots, take them out and start eating. This will also help you know the level of heat in the brine.
12 Remove peppers and place in a blender or food processor. Pulse blend until all large chunks have become smooth and fine.
*
Dear lord look at that
*
13 Add small amounts of the brine while on setting one. Slow and steady is key -- we are not trying to make soup!
*
Yes I still wear Vans - cause they rock
*
14 Once the desired texture is reached - place the mix in a small pan and bring to a boil. This should be super fast -- Do not keep on the heat past a boil.
*
Fast Boil and stop or I will haunt you
*
15 Place the sauce back in the mason jar and cool. Enjoy
Caution this might be the hottest sauce you have ever had!
*
The Devils Ketchup
*
Booo yahhh…. You just made your own hot sauce and I bet it's amazing. If you messed up well that sucks for you. Just give me a DM and i'll try to figure out where you went wrong in life. XOXO
Hope you had fun and make sure to send me pics of your messy kitchen and the finished product. If you have something you would like me to cook and post please let me know.
Blue skies
Smile, Life is amazing
Brian
Roasted Beets
Prep time 00:40 min
Cost $6
Category: Side dish (4-5 people)
Today's side, Roasted beets or what some people call red stuff that will haunt you for two days. This is a super easy and inexpensive side you can add to most any meal. Don't get all nervous Nancy your kids will enjoy these too. If you hate greens please remember these are red, just give these a try, worst case you and your friend Karen can email me and tell me I was wrong and that these suck. Or you will enjoy them and add them to your super secret list of good easy food to make.
If you have any questions, comments and or concerns please feel free to reach out and I will be sure to answer as soon as I can..
Do you have a photograph of me in your home yet?
I need love too.
Need more food ideas
https://www.pussfoot.com/blogs/food
What do you need
2 large fresh beets
2 good olive oil
Aluminum foil
? Salt to taste
1 PussFootOG apron - cause it will help you cook better
*
Im so right.....
*
*
Come on in, im making beets
*
And We Begin………
1 wash beets well as you will be leaving on the skin
*
*
2 with a good knife and cutting board dice beets into 1 inch pieces
*
just wait untill tomorrow
*
3 place beets in tin foil
*
Dont they look soooo happy in the foil
*
4 cover with olive oil, make sure all of them are covered
*
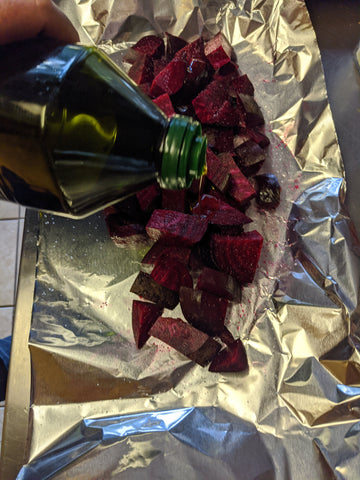
Almost time to go tanning
*
5 add salt ( I normally just give them a quick dusting ( not to much )
*
just a pintch
*
6 fold tin foil leaving a small handle on the top - this will keep the oil from leaking out
*
If you look close you can see i did not leave a handle. But no one tells me how to live my life.
*
9 I use my Grill but an oven at 450 will work as well * place on grill on high for 35 to 40 min. * if using an oven place on top rack for the same amount of time
*
Put on high. This will also clean your grill- Your welcome
*
10 remove from heat, place in a bowl and enjoy. * I normally add more salt to taste at this time.
*
Trust me these are amazingballs
* Don't tell your kids and or friends what will happen in the morning when they use the bathroom. It is way more fun to see a nervous face once they have done their biz.
*
yum yum yum
*
Booo yahhh…. You can add these to any main dish or salad. Roasted beets really go with anything and are a welcome addition to your Autumn menu. I hope you enjoy as much as I do
If you messed up well that sucks for you. Just give me a DM and i'll try to figure out where you went wrong in life. XOXO
Hope you had fun and make sure to send me pics of your messy kitchen and the finished product. If you have something you would like me to cook and post please let me know.
Blue skies
Smile, Life is amazing
Brian
Brussel Sprouts
Prep time 00:20 min
Cost $6
Category: Side dish (4-5 people)
Today's side, Brussel Sprouts or what some people call alien brains will blow your mind and is a super easy and inexpensive side you can add to most any meal. Don't get all nervous Nancy your kids will enjoy these too, you can doctor these up too, adding bacon or whatever you like. If you hate greens please just give these a try, worst case you and your friend Karen can email me and tell me I was wrong and that these suck. Or you will enjoy them and add them to your super secret list of good easy food to make.
If you have any questions, comments and or concerns please feel free to reach out and I will be sure to answer as soon as I can..
Do you have a photograph of me in your home yet?
I need love too.
Need more food ideas
https://www.pussfoot.com/blogs/food
What do you need
1 Package of Brussel Sprouts around 10 to 12 in a pack
1 clove of garlic
¼ onion
2 tablespoons butter
1 Teaspoon pepper
1 cup cold water
1 medium frying pan
? Salt to taste
1 tight pair of leggings (guys and girls) cause they are boss
*
Eat your greens sucker
*
And We Begin………
1 open and wash Brussel Sprouts in a strainer
2 slice down the middle
*
cut them mofos in half
*
3 Add two tablespoons of butter
*
did you know the lines on the bar give mesurements
*
4 Dice ¼ onion and add to pan
*
in the pan like I said
*
5 dice one clove of garlic and add to pan
*
Happy little family
*
7 Add Pepper ( I would leave salt out until the end when you taste.)
*
smells like Long Island
*
9 Add 1 cup of water. Place on high heat and melt butter while mixing - make sure to coat everything in the butter
*
sometime I wonder what people wear when making my food
*
* Lower heat and allow it to simmer- we need to boil out all of the water ( or most of it, you should be left with a buttery liquid at the bottom of the pan that you will drizzle over the sprouts when you serve them.
*
Outstanding
*
Booo yahhh…. You can add these to any main dish. Remember you can change the recipe up with some pancetta or bacon. You just need to dice and add to a hot pan prior to completing the very simple steps I gave you above. Ok go eat people.
If you messed up well that sucks for you. Just give me a DM and i'll try to figure out where you went wrong in life. XOXO
*
*
Blue skies
Smile, Life is amazing
Brian
Habanero Potatoes (Patatas Bravas)
Prep time 00:20 min
Cost $6
Category: Side dish (4-5 people)
*
This has nothing to do with the recipe, I just like the pic
*
Today's side,Habanero Potatoes or what some people call Patatas Bravas (a typical tapas dish developed in Spain) will blow your mind and is a super easy and inexpensive side you can add to most any meal. Don't get all nervous Nancy with the name, you can doctor these up to any heat level you like. If you aren't all peas and carrots with my recipe ( as it is a spin off of the traditional dish) I am sure you and your friend Karen can find a different recipe to suit your needs lol. I think you will enjoy these as most people who eat them tell me that they are CRACK.
If you have any questions, comments and or concerns please feel free to reach out and I will be sure to answer as soon as I can..
Need more food ideas
https://www.pussfoot.com/blogs/food
What do you need
1 Habanero ( green medium heat, orange hot, red hottttt) so pick the pepper that suits you
* I grew that
*
1 clove of garlic
¼ onion
1 can of white diced potatoes - *if you can't find diced use full and dice them If you use two cans double the curry, pepper and paprika - only add one more tablespoon of butter.
2 tablespoons butter
1 teaspoon of curry
1 Teaspoon pepper
1 Teaspoon paprika
1 packet of sazon
1 medium frying pan
1 tight pair of leggings (guys and girls) cause they are boss
*
Even Simon likes it
*
And We Begin………
Oil.
1 open and wash potatoes in a strainer
*
showing un-diced cause well I felt like it
*
2 Add potatoes to frying pan
*
In the pan
*
3 Add two tablespoons of butter
4 Dice ¼ onion and add to pan
*
make sure to have your eyes directly above when dicing
*
5 dice one clove of garlic and add to pan
*
Garlic incase you didn't know
6 Dice Habanero peppers and add to pan
*
so hot like me in leggings
*
7 Add Pepper, sazon, paprika and curry * if you hate curry leave it out
*
Look at it would ya.
*
8 Mix well
*
Mix like your life depends on it
*
9 Place on high heat and continue to mix until butter is melted and all of the potatoes are coated.
*
All mixed up dont know what to do
*
* Now here is where I like to get weird - I like to cook until it begins to brown. Once this happens I remove from the heat and allow it to sit for 5 to 10 min. Right before the rest of the meal is ready to serve I place the pan on a high heat and allow it to cook for 5 more min. This way the potatoes are super warm for serving and it also prevents them from burning, also helps to ensure that the flavor is soaked into the potatoes.
*
All done
*
.
Booo yahhh…. You can add these to any main dish. Remember you can change the heat level to your liking. Also like i said if you are not into curry, you can leave it out or just add less. In my opinion the curry gives these a real Caribbean feel. Ok go eat people.
*
*
Blue skies
Smile, Life is amazing
Brian
]]>
Roasted Red Peppers
Prep time 00:35 min
Cost $4
Category: Side dish
*
*
What do you need
2 Red Peppers
1 Baking rack
1 Medium mixing bowl
1 sheet plastic wrap
6 Tablespoon olive oil
1/2 Teaspoon of salt
1/2 Teaspoon pepper
3 Tablespoons of onion
2 cloves of garlic
1/2 teaspoon basil
1/2 teaspoon oregano
1 mason jar or something to store them in
1 small frying pan
6 nude photos to send to your friends
And We Begin………
*
Some of the things you need
*
1 Add 6 tablespoons of good olive oil to a small frying pan
2 Add fine chopped garlic and onion
3 Add ½ teaspoon of basil and ½ teaspoon of oregano
4 Add ½ teaspoon of basil and ½ teaspoon of oregano
*
I am the light that keeps you drooling
*
5 Add ½ teaspoon of salt and same for black pepper
*
PS. im completely naked
6 place on medium heat
7 Cook until the garlic begins to brown
*
This will continue to cook once off the heat
*you need to keep an eye on this part. If the garlic burns its over - all we are trying to do is infuse the oil with the flavor of the items we just added
7 Remove from heat and allow to cool
*
1 Place Baking rack on top of your range
*
One should always cook in the nude
*
2 place pepper on rack above the heat
*
So Hot..
*
3 with tongs make sure to turn the peppers ever min or so
*
Look i turned it.
*
4 Roast until completely soft (LIMP) They should be blackened. Don't worry this is okay.
*
Almost done
*
5 Remove from heat once limp as a man on his 75 wedding anniversary and place directly into your mixing bowl.
*
One pepper coming right up
*
6 cover the bowl with plastic wrap (make sure it has a tight seal)
*
This Part is extremely important
*
7 allow to rest for 10 to 15 min.
***************************************************************************************
1 remove the peppers from the bowl (careful they will still be hot)
2 In a clean sink- wash the blackened skin off under cool water.
*
This is a great time to wash your hands
*
3 Remove the top of the pepper and slick one side down the middle
*
You can save some of the top if you like
*
4 Remove all seeds (you can do this with the dull side of a knife- slowly scrape the seeds away
*
I use the sharp side but hey im Brian
*
5 slice pepper in to lobe skinny strips
*
After this step send me nudes
*
6 Place in bowl and add the oil that we made (make sure it's not super hot warm is ok)
*
This smells like success
*
7 Add to a mason jar or whatever you have and place in the fridge to cool.
*
Freaking devilish how good these are
*
Important
*
Blue skies
*
Smile, Life is amazing
Brian
]]>
Sausage and Broccoli
Prep time 00:30 min
Cost $16
Category: Main dish
They need love too.
What do you need
1 large frying pan
1 wheel of sausage
2 cloves garlic
2 large heads of broccoli
4 tablespoons of olive oil
1 tablespoon of butter
2 cups of water
6 nude photos to send to your friends
And We Begin………
Sausage:
1 Place sausage on a hot grill - don't have a grill, use a frying pan. *Again we are using a wheel of sausage not the fat Italian links. I get mine from the Depot however any good market or deli should have this.
*
Long Hot Meat. Relax ladies
*
2 I like to watch the sausage and turn it often. I look for a brown link rather than black. Keep it sweating and it wont burn. Also indirect heat works better
*
Sweaty Hot Brown sausage
*
3 cook until golden brown - I would say no more than 15 min - however i do not know what you are working with * see above
*
This is how I keep the heat on my grill
*
4 cut into 2 inch sections and set aside
*
Dont just look at it - EAT IT
*
Broccoli:
*
Only with fear can you control the veggies
*
1 Wash your veggies - you are not a filthy person
2 cut the broccoli into small pieces and place on the side
*
Like a boss- Lick a piece and dont tell anyone
*
3 place broccoli into a cold pan
*
Licked one :-)
*
4 Mince two cloves of garlic and place in pan
*
If you smell the screen you can almost smell me
*
5 Add oil and butter
6 Add 2 cups of water
*
I Guess vodka wouldn't be to bad
*
7 place on heat until water has reduced to ⅛ of in inch ( really just looking for a very small amount of water and oil on the bottom)
*
8 mix - you want to coat all of the broccoli in the butter and oil. Total cook time depends on your pan and source of heat. Mine normally takes around 10 min.
Mix Them Together:
1 Add cut sausage to the broccoli and cook for no more then 6 min on a medium heat. All we are trying to do is blend some flavor and steam up the susage with the remaining liquid.
*
Hot Dam this looks good
*
Blue skies
*
Smile, Life is amazing
Brian
]]>Yellow Rice
Prep time 00:20 min
Cost $4
Category: Side dish
*
I know this much is true
*
Today's side, Yellow rice. This side goes with anything and everything. Not to mention it is extremely inexpensive and filling. I know this seems way too simple to post, however lots of people do not know how to make this no matter how simple it is and for that reason we are getting it up. Really - not much more I can say about it after it's just rice.
Don't buy boil in a bag rice. Buy a bulk bag it's cheap and takes the same time to cook. Matter of fact- I think it's easier to cook it out of the bag. Who hasn't burned their hands trying to open a bag when it's done?
If you have any questions, comments and or concerns please feel free to reach out and I will be sure to answer as soon as I can..
Link to other fun recipes
https://www.pussfoot.com/blogs/food
*
Lets avoid this like the Noid
What do you need
1 sauce pot
2 cups of rice
2 Tablespoon butter
1 Tablespoon salt
1 packet of sazon
4 cups of water
6 nude photos to send to your friends while you wait for it to boil
And We Begin………
Rice
1 Place 2 cups of rice into your pot
*
silly bastard that's only one cup
*
2 Add 1 tablespoon of salt
*
I said salt not meth
*
3 Add one packet of sazon
*
Just like Franks I put this shit in everything
*
4 Add 2 tablespoons of butter
*
Did you even know that's what the lines are for on the stick of butter
*
5 Now add 4 cups of water
Cold water boils before hot -- Google it !!!!
Cooking.
1 Stir the mix to insure you do not have any clumps
2 place pot on a high heat with lid until it begins to boil
*
Oh Look, im in the reflection Your welcome ladies.
*
3 once the water begins to boil - lower to a medium heat for 15 to 20 min
*
Sooooo MOIST and steamy
*
*keep an eye on this, not to get into science but depending on the humidity and altitude it may cook faster or slower in your area. You do not want burnt rice...
4 Once reduced remover from the heat and stir
5 Let cool for 5 min and enjoy
*
My Grandma Plates
*
For all the people that do not like yellow rice. Add one more tablespoon of salt and forgo the sazon. That's it -- super easy and much cheaper than boil in a bag, it tastes better too.
Booo yahhh…. Now go enjoy your friends and family and whatever else you made today.
If you messed up well that sucks for you. Just give me a DM and ill try to figure out where you went wrong in life. XOXO
I hope you enjoy as much as I do
Hope you had fun and make sure to send me pics of your messy kitchen and the finished product
Blue skies
*
Smile, Life is amazing
Brian
*
Today I wanted to share a super simple side salad that my friends and family both enjoy. It is a perfect addition to any summer BBQ or meal. Cucumber salad will only take you a few moments to put together and a perfect way to get the kids to eat some veggies.
If you mess this up you really need to rethink your choices in life.
If you have any questions, comments and or concerns please feel free to reach out and I will be sure to answer as soon as I can..
Did you sharpen your knife today?
They need love too.
Link to other fun recipes
https://www.pussfoot.com/blogs/food
*
*
What do you need
1 large salad bowl
2 large cucumbers
1 Tablespoon of pepper
4 Tablespoons of salt (yes it's a lot but trust me)
4 stalks of celery
½ onion
3 cups of white vinegar
1 cup of water
1 poster of me in a speedo for your viewing pleasure
Cucumber.
1 peel the cucumbers leaving 3 small strips of skin
*
Look at it would you small strips
*
2 remove ends and discard
3 Slice cucumber into ⅛ inch rounds
*
So Moist I love that word
*
4 place in salad bowl
Onion.
1 Slice onion to your liking (I prefer bigger chunks)
*
If 2020 was a vegetable
*
2 Place in salad bowl
Celery.
1 French the celery (oh you don't know?) slice it longs ways
*
I love everything French
*
2 Dice celery to your liking (again I prefer bigger chunks)
*
Did you know that I'm God's gift
*
3 Place in salad bowl
Perfect your almost done and you only took 2 min to follow all of the directions above
Mixing.
1 Add 4 tablespoons of salt
*
Eat right stay fit die anyway
*
2 Add 1 tablespoon of ground pepper
*
Fresh Peppar LOL
*
3 Pour 3 cups of white vinegar into the bowl
*
Pour it like you mean it
*
4 Pour 1 cup of COLD water
Yeah im not adding a Pic of the water...
5 Mix well and enjoy.
*
blahh blahh blahh
*
Booo yahhh…. Now go enjoy your friends and family. Or let me know and ill be right over.
You can eat this right away however I prefer to allow this to sit for around 2 hrs at a minimum. The longer you allow it to sit the more flavor it will have. I find myself making this when I go inside to grab a drink around noon. This way it is full of flavor for supper.
I hope you enjoy as much as I do
Hope you had fun and make sure to send me pics of your messy kitchen and the finished product
If you are really having issues making this DM me and i'll walk you through it. However i'll laugh at you cause you couldn't make a salad, I mean really!!!
*
Blue skies
*
Smile, Life is amazing
Brian
Lemon Butter Salmon
Prep time 00:10 min
Cook time 00:25 min
Cost $ Market - most times around $20
Feeds 4 with sides
*
*
Me having to cook fish
*
Link to other fun recipes
What do you need
1 Seafood grilling tray - Oven (oven safe pan like cast iron)
*
Got ya.. This tray is very useful for this dish
You can buy this from the home depot
*
1 basting brush
1 2 lb salmon filet
1/4 tablespoon of ground black pepper
1/4 tablespoon salt
1 Lemon
1 tablespoon of dry basil
½ stick butter
1 tablespoons of olive oil
2 fresh garlic cloves
1 laundry pin for your nose
Fish.
1 Place the fish on a seafood grill tray *skin down* (I always put paper towels under the tray to stop and nasty from getting on my cutting board also treat the try with oil prior to placing fish)
* Can you smell that? cause I can :-(
2 Season lightly with salt and pepper (Make sure to cover the entire filet)
*
Pic in place of salt, Cause lemons look better
*
3 Slice the lemon and place on top of the fish *you need to baste the filet with the butter mix before placing the lemon slices. see below..
*
Look at it Karen Just look...
*
4 Hold Fast - Is your grill on?
Basil butter.
1 Mince two cloves and place in a small microwave safe bowl
2 Add 1 tablespoon of dry ground basil in bowl
3 Add ½ stick of salted butter to the bowl
4 Microwave until melted and stir
*
*
Make it look like that or else it wont work
*
Cooking.
*
The tray is seasoned with lost boys
*
1 Lightly brush the warm butter onto the flesh of the fish. (I do this right before I place this on the grill) Make sure to cover everything including the lemon.
*
Some people like this I guess
*
2 Place the center burner on your grill to low, Front and back should be on Medium
3 Set the seafood tray in the center of the grill
*
Put it where I say
*
4 Close the grill allow to cook for 5 min
5 Baste the fish every 5 Min ( make sure you close the lid in between each basting)
*
Sausage is for me
*
6 I cook this for around 20 min however feel free to add or subtract time depending on your grill or your preference) - *I like to see browning on the sides of the filet before serving.
7 Remove from heat and baste one last time. Allow the fish to rest for 5 min prior to serving.
*
It broke when I took it off cause I was holding my nose
*
Booo yahhh…. Now go enjoy your friends and family just keep it away from me!!
*
So Babe how does dinner smell behind the glass wall
*
Really though all of my friends and family ask me to make this nearly every weekend. They can't get enough - generally I am making on average 4lbs. FML…………
Blue skies
Smile, Life is amazing
Brian
]]>
*
Come on in. Lets eat
*
Prep time 00:10 min
Cook time 00:45 min
Cost $16.00
Feeds 5 plus with leftovers
What do you need
1 large cast iron or oven safe pan
3 or 4 large thick chick breasts (this all depends on what the local market has on hand)
1 tablespoon of ground black pepper
1 tablespoon salt
1 packet of sazon
½ large cabbage
4 tablespoons of olive oil
4 fresh garlic cloves
6 oz of beer
Cabbage
1 Wash and peel the outer layer of the large green cabbage
*
remove the lotion on the skin
*
2 Cut the cabbage in half. (if you are making this for more than 4 people you may want to use the entire cabbage if not put away and use later for who knows)
*
this knife is $26 on amazon
*
3 Slice the cabbage thin ( see the pic below, we are trying to make this look shredded; we do not want the cuts to be thick!)
*
looks like you can dance
*
4 Once complete place the cabbage into the bottom of the pan
*
It puts the cabbage in the pan
*
5 Add 6 oz of a light beer
I dont think you need a pic of me pouring beer into a pan
Chicken
1 Do not wash the chicken - what is wrong with people you never wash the chicken like ever- well maybe if your drinking and dump in on the floor but nah you should not wash the chicken
2 place the chicken breasts on the cabbage - have the thickest part of the breast toward the middle of the pan (imagine a star shape) if you want to roast a garlic you can place it in the center of the star)
* if they have skin - remove and wear it like a boss
*
3 lightly spread olive oil on top of each breast
again you dont need a pic of me putting olive oil on the chicken
Season
*I only season the top of the breast, as the beer will only wash off the bottom anyway
1 Sprinkle sazon on top of the chicken breast - any left over can be put on the cabbage
2 Now the pepper - you should also add salt at this time
it should look like this
Sazon is the best - Change my mind
*
Garlic
*If you are roasting a garlic with this dish place it in the center of the pan
1 Cut the top of the garlic off
2 Poor olive oil on top of the garlic
If not....
1 slice the garlic thin (2 cloves)
2 place garlic on top of the chicken
*
It puts the garlic on the skin
*
3 mince the other two cloves and sprinkle over the entire dish
Cooking
1 Preheat the oven to 375
2 place the pan on the center rack
3 cook for 45 min
4 If using cast iron please be careful that shit is hot..
*
I love this
*
Booo yahhh…. Now go enjoy your friends and family
I generally slice one breast at a time and serve the cabbage on the side. Place the remaining chicken in the fridge. The possibilities are endless with the leftovers. As i stated if you have a meat slicer you have cold cuts. Other ideas - tacos, pasta sauce, a quick chicken and broccoli - I mean use your heads, you should have 1.5 to two breasts remaining. FOOOOOOOOOD is good for the soul.
Blue skies
Smile more people
Brian
]]>Prep time 00:10 min
Link to other fun recipes
What do you need
2 tablespoon of salt (if you are sodium conscious feel free to use less)
1 tablespoon of ground black pepper
½ large cabbage
4 tablespoons of olive oil
1 large cucumber
1 ripe avocado
2 cups of vinegar (I use white but if you're feeling frogy have at it with whatever you like)
1 salad bowl
1 great sense of humor
*
*
And We Begin………
Cabbage.
1 Wash and peel the outer layer of the large green cabbage
*
Dont be a Karen just wash it
*
2 Cut the cabbage in half. (if you are making this for more than 4 people you may want to use the entire cabbage if not put away and use later for who knows)
*
would you look at that knife (Old Hickory)
*
3 Slice the cabbage thin ( see the pic below, we are trying to make this look shredded; we do not want the cuts to be thick!)
*
got on the slides like a boss
*
4 Once complete place the cabbage into a large salad bowl
*
It puts it where I say or else ill dance on your lawn in a speedo
*
Cucumber.
1 wash the cucumber (cause your not a slob and or a dirty person)
*
does size really matter ladies
2 Peel the cucumber. (I like to leave three strips of the skin on the cucumber I feel it gives a better snap and hey its makes it look oh so fancy)
*
like your trimming up a runway
*
3 Slice the cucumber in half… then cut long ways creating small pieces (This isn't rocket science)
*
* See
*
4 Once complete add to the salad bowl with the cabbage
*Do you really need a pic of this -- Come on
Ok look at you go. You get a star, keep it up an you might get more
Seasonings.
*I season the salad prior to adding the avocado.
1 Add salt
*
Thats Salt
*
2 Add pepper
*
Look at you go, your getting it just like riding a ....
*
3 Add oil
*
Get to the chopper
*
4 Add vinegar
*
Look at my feet whats that called?
*
Mix all together well. (until the oil and vinegar have coded all of the items in the bowl.
*
See that wasn't so bad
*
Avocado
1 cut the alien egg in half. (avocado)
* Trust me you dont need a pic
2 remove alien embryo (avocado pit)
*
We dont need no stinking pit
*
*If you have an avocado slicer Boo Yah you know what to do. If not go to step three
3 Using a spoon, slowly follow the skin of the avocado to gently remove the flesh. It's not hard but will take some finesse. Once the skin has been removed place the flesh pit side down on a cutting surface and repeat on the second half.
4 Slice the avocado thin and place on the top of the salad. (I mix mine in but you do not have to. If you decide to mix it in do so but very softly. Kinda like you were whispering sweet nothings into my ear)
*
*
Blue skies
Brian
]]>Prep Time 00:30
Dont knock it till you try it
*
Crazy cooks are the best cooks
Now that the world stuck inside during this pandemic and everyone has been sending us messages about how bored they are not jumping, I thought it would be a great idea to share a family recipe. Not only is it tasty but it will feed a family of five for under $20 with leftovers. So, get on your apron and get ready to have some fun. If you do attempt to make this dish please share some photos with us. Have fun!
With all of us trying to save money during this strange time and also cooking with canned food, I thought this recipe is perfect. You can doctor it to your liking with different ingredients. All you really have to stick to is the base.
This also needs to be served over something, I generally use rice.
If you have any questions, comments and or concerns please feel free to reach out and I will be sure to answer as soon as I can..
Link to other fun recipes
https://www.pussfoot.com/blogs/food
What do you need
*
I need some new moves
*
1 tablespoon of your favorite seasoning I use sazon
1/2 teaspoon of black pepper
3 or 4 small top round steaks (sold in a package for around $5-7)
*
$4.80 im such a bargain hunter
*
*This can also be substituted with chicken.
2 Tablespoons of butter
3 Tablespoons of good olive oil
1 half of a small onion diced
2 cloves of garlic diced
1 16 oz can of cream of mushroom soup (I use generic around $1)
1 can of mixed veggies - (add whatever you like - sometimes I add nothing sometimes i add canned potatoes or frenched green beans) $1
1 large frying pan
2 cups of water
Barny Stinson
*
True Story
*
Meat
1 Make sure your meat is defrosted. Take the meat and cube it with a sharp knife.
*
Made you look
*
2 Once cubed place in a bowl and place aside
Garlic
1 Take two cloves of garlic and dice fine
*
chop chop we dont got all day
*
2 Once diced place in bowl
Onion
1 Dice the desired amount of onion
*
is it me or is onion just a fun word to say
*
2 Once again place in a bowl - can be in the same bowl as garlic.
Cooking
1 Place the meat in frying pan with garlic and onion
*
It Puts in the pan or else it gets the hose again
*
2 Add seasoning (I add pepper and sazon)
*
pure amazing just like me
*
3 Add three Tablespoons of good olive oil and butter to pan
*
At this point im generally drinking a bunch too
*
4 Place stove to a medium to high heat
5 Keep stirring as we are just trying to brown the meat
*
Brown not burnt -- More drinks
*
6 Once brown, add two cups of water and lower heat to a simmer.
*
water not vodka - save that for your date.
*
7 Allow mix to simmer for at least 20 min (*if you need to add more water that’s ok / just remember we need it to reduce to around ¼ in the pan, we are not making soup.) * you can also add any other veggies you like at this point for this weeks i used caned mixed veggies
*
What ever you want babe just dont hit me any more
8 Once reduced, add the cream of mushroom to the meat and mix well. (* your need to make this smooth like silk)
*
when the hell are the kids going back to school
9 Simmer on low heat for 10 more min. Remove from heat and serve over rice or really what ever you want.
*
I respond to my kids teachers with silly haiku poems cause I have nothing else
*
*
I even put it on grandmas plate
*
Under $20 and you just fed your entire family something amazing…
I hope you enjoy as much as I do
Hope you had fun and make sure to send me pics of your messy kitchen and the finished product
If you are really having issues making this DM me and i'll walk you through it
Blue skies
Oh Look #imfun
Brian
]]>Casserly or Casserole
Remember drop Brian's not bombs
*
So Moist!
*
Now that the world stuck inside during this pandemic and everyone has been sending us messages about how bored they are not jumping, I thought it would be a great idea to share a family recipe. Not only is it hella good but it is near and dear to my heart and is the ultimate comfort food. So, get on your apron and get ready to have some fun. If you do attempt to make this casserole please share some photos with us. Have fun!
This recipe has been made in my home since I was a child. No matter the occasion my mother would have one or two ready for me to house. Fun fact, when I asked for the deets on how to make it, she gave me a recipe that never ever ever worked. So the engineer in me went to work and came up with this. I hope you enjoy it as much as me and my family does!
If you have any questions, comments and or concerns please feel free to reach out and I will be sure to answer as soon as I can..
Link to other fun recipes
https://www.pussfoot.com/blogs/food
What do you need
*
Do as I say
*
1 tablespoon of salt
2 packages of frozen chopped broccoli
2 eggs
6 Tablespoons of butter
¾ cup of chopped onion
1 16 oz jar or brick of cheese wiz or soft Velveeta cheese
2 baking tin (round) I use this due to the fact that this dish is extremely hard to clean, dont believe me just try a normal dish you will be scrubbing for days..
1 package of Ritz crackers
Remember
*
lol
*
Preheat your oven to 350 deg......
If you do not want to cook it right away you can place it in your fridge for up to a day. However this will add around 15 min more to the cook time when ready.
This is how I prep this dish. If you feel you can be more efficient doing it a different way or in a different order please feel free to do so. The main goal is to have all of the ingredients mixed while hot. However you make this happen is up to you.
Broccoli.
1: Open the two frozen packages of broccoli and place them in a medium saucepan with two cups of water on a high heat.
*
* It Puts the Broccoli in the pot
*
2: Cook the broccoli until soft. This should take around ten min depending on the amount of heat you supply. Once soft add 3 more min to the broccoli to ensure that it is cooked.
*
So Hot....
*
3: Once cooked place all of the broccoli into a strainer and begin to drain. This stage is crucial. You must drain as much of the water from the veggies as possible. * I use a wooden spoon to press the broccoli until it stops dripping.
*
Drain it like its a red headed step child
*
4: Place broccoli into the baking tin
*
Check out the feet I need to start a dance school
*
Onion.
* I am normally doing this step at the same time I am cooking the broccoli.
1: Chop your onion fine
*
Got Ya !!!!
*
2: place onion into a medium frying pan and add 6 tbl of butter.
*
You Need to try a Docs Draft they rock.
*
3: on a medium heat fry onion in butter until they begin to turn brown.
*
Smells like success
4: add to the broccoli
*
Yeah other stuff is in this pic, Just keep reading
Okay look at you go. You succeeded in cooking frozen broccoli and some onion in butter..
Now take the hot broccoli and hot onion and place in the baking tin.
Once you have the onion, butter and broccoli in the tin you will need to add the eggs. Crack two large eggs and place in the dish. Be careful not to get any shell in the dish. ( if you need to ask why just stop here and go sit in the corner).
* these are all added at the same time and the order will not matter.
Great you have eggs,broccoli and onion in your dish, great job. Now add the 16oz of cheese. * again the cheese whiz in a jar works best, if you can not find it the brick will work but you will have to mix a lot more. I used a brick during this as I was not able to find any at my store.
Once the cheese is added you need to begin to mix. Normally a wooden spoon is fine. However if you are using a brick of cheese I find a wooden fork to do best.
*
*
Mix
1: Mix away until the casserole is fluid. * it should have no chunks and have the consistency of jello, meaning it is loose like a stew.
*
How are your arms feeling?
*
2: Add flour. * This part all depends on how well you drained the broccoli. I normally use 6 heavy tablespoons. If you find the casserole to still be to moist you can add more. The goal is to have a consistency of mashed potatoes. It should slowly drip off your spoon.
almost done
*
It should slowly drip off the spoon
*
Baking
Your oven is now at 350 deg
Take the Ritz crackers and crush them in your hand and spread them generously on the top of the casserole until covered.
*
Crush them like your enemies
*
*
Place the dish on the center rack of the oven and cook for 60 min.
*
Now serve
*
Always sunny in Philadelphia any one ?
*
Booo yahhh…. Now go enjoy this addictive casserole
Once you try it there is no going back. Like ever again
I hope you enjoy as much as I do
Hope you had fun and make sure to send me pics of your messy kitchen and the finished product
#PussFootOG
If you are really having issues making this DM me and i'll walk you through it
Blue skies
*
Smile, Life is amazing
Brian
]]>
Not the CLAP
Both will burn just in different ways
So you tackled the French Bread but you have nothing to dip it into. You could go to the store and get some generic hummus or meats, maybe some delicious Sopressata or liverwurst ← my personal fav… don't knock it till you try it. And trust me anything you put on the bread is going to be epic. However, if you are looking for something fun that will fill your house with some amazing smells then I got a dip for you. This is super simple and you will love it assuming that you like seafood.
*
Link to Bread recipe
*
https://www.pussfoot.com/blogs/news/covid-cooking-with-brian-french-bread
What you need
*
The Stuff
*
24 littleneck clams - or more if you want it's your call (try to keep them small)
* the ones in my PICS are on the larger size due to covid and nothing being available in NY #notafan
1 bottle of beer (any lager is cool)
1 bottle of white wine (Wineo cheep is fine)
4 large garlic cloves minced
1 small onion diced (I like a white onion or Spanish *keep the red one where they belong in the trash)
1 stick of butter
1 lemon
Cleaning:
To start, make sure you bought live clams in the shell. You will need to place all of the clams in a large pot. Once you have them in the pot put that in your sink and rinse them well.
This will remove any nasty grime that may be on the shells. Once you have rinsed them keep all the clams in the pot and fill it with cold water.
We need to get these bad boys to spit out all the sand out of them. * I tend to let them sit for 20 min then dump the water and restart (repeating 2 to 3 times). If you have a bucket you can leave it outside with the house running on low for 30 min and this should do the trick.
*
Clams soaking in COLD water
*
Cooking:
1. Place the clams in the bottom of a large Pot (I use a dutch oven).
*
Again look at that third position my ballet is on point
*
2. Pour 4 cups of water into the pot
*
So MOIST!!!! lol
3. Add one 12 ounce beer
*
I always hear Homer Simpson saying mhmm beer.
4. Add in garlic and onion
*
Good job
5. Add the zest of the lemon and then slice and toss in
*
* Cause who dont like lemon
6. Pour half a bottle of white wine (keep it cheap)
*
So Classy
7. Turn stove on high and cover pot for 20 min or until the clams begin to open
*
Just Put the freaking lid on and light it
8. Once clams are open add one stick of butter and the remaining white wine
*
No PIC for YOU
*
9. Cook for 15 more min on a low to medium heat - this will extract the flavor from the clams
10. Serve - you can serve this in the same pot you cooked them in (careful it's hot) or you can remove the clams and serve separately from the sauce.
*
NOW EAT !!!
*
*Notice*
Dont Mess up (dont know how you could with all the pics). But if you did -
Bless Your Heart.
****Make sure your friends aren't allergic to shellfish****
Really though if you need help email us!
No matter how you serve these, they are sure to be a hit.
You can also do these on a grill in a foil dish. Or in cast iron over a fire. I tend to make these where however I can and trust me there is never enough. Make sure you have ample bread to dip. Have fun all and remember this will end (covid), and when it does make sure to make these for all of your friends. Nothing brings people together better than food!!
And once again if you messed these up -- go sit in the corner.
PS. if you have leftovers, place the clams in a food processor and mince. Add minced calms back to the strained sauce and store in fridge. This will keep for around a week depending on how much salt you have added. Once you are ready make some linguine and poor in the mixture. YOUR WELCOME !!!!!
Now that the world stuck inside during this pandemic and everyone has been sending us messages about how bored they are not jumping, I thought it would be a great idea to share a recipe for my bread. Not only is it hella good but it takes up a good portion of your day to make, hence taking up time that you would be sitting around doing nothing.
So, get on your apron and get ready to have some fun. If you do attempt to make this french bread please share some photos with us. Have fun!
If you have any questions, comments and or concerns please feel free to reach out and I will be sure to answer as soon as I can..
What do you need
1 tablespoon of active or dry yeast (unlike me this is this is the big spoon)
2 tablespoons of sugar - pour that shit on me
1 tablespoon of kosher salt
2 tablespoons of olive oil
4 cups of bread flour * if you do not have bread flour all purpose will work
You will also need some corn meal but the portion is not important
3 cups of water - give or take ( depending on your altitude and relative humidity
1 stick of butter (this is for the end do not add to the mix)
2 baking trays
Let's Roll…..
1.
Yeast.
If you have dry yeast you will need to activate it. This is super simple but critical in making the bread. If you mess this up you will just make flat bread and we don't want no stinking flat bread.
To begin
Take 2 1/2 cups of warm water (warm like as in warm as in kinda hot) and place it in a bowl. Then I would like you to add in the 2 tablespoons of sugar and stir it until it dissolves. ( a few whips with a fork should do. Once you have completed this open your yeast packed and add to the mix.
WALK AWAY!!! Give it 10 min to start to bubble. Once it has activated move on to part two.
*if you have active yeast, mash it with a fork prior to adding water and sugar. I would still recommend stirring it with a fork for a few seconds in order to make the mixture.
Active Yeast, No need to wait !
Putting stuff in the mixer.
If you're lucky you have a mixer, if not you have some work ahead of you but it's not that bad.
*
*
1. Add the oil and salt into the bottom of the mixing bowl.
2. Now add 3 cups of flower to the bowl
*
*
Good you didn't mess it up yet
3. Now slowly add in the 2 1/2 cups of water yeast and sugar and start to mix
* the dough should be sticky at this point and that is fine
*
Still a bit sloppy
4. Add the 4th cup of flour slowly
5. Mix more water if needed * depending on the humidity you may or may not need this however I found I generally do.
The dough should be pulling away from the sides of the bowl; it should not be a sloppy mess.
6. Turn off mixer and now use your hands to knead for a moment. This will let you know how wet your mixture is. YOU do not WANT it to be sloppy wet, if it is just add a bit more flour to it until you can pick it up.
*
Wash Your hands first I mean come on
7. Lightly oil a bowl ( I use olive oil and a paper towel) once you have greased the bowl, place your dough inside and cover with a kitchen towel.
*
Made you Look
*
*
Ok, you did it! The first part of your journey is complete. Now all you have to do is set the timer for 60 minutes. Buy why? Well we need to allow the yeast to do its thing. Over the next 60 min your dough is going to double in size and start to do science stuff.
DING. It's been 1 hour and you didn't peak and or touch the dough.
*
That 5th position though
8. Transfer gently from the greased bowl to an oiled cutting board.
*
*
9. Cut into 4 equal portions
*
10. Roll the bread to form dough logs in your hands (3 inches wide and up to 8 inches long) and place on a well greased or oiled baking sheet.
11. Sprinkle cornmeal on the tops of the dough logs
*
*
12. ** Take plastic wrap and cover the logs one by one ( Make sure to keep them apart, as they will grow and you do not want them to touch- you will be forming the log while you do this - think about what you want your bread to look like and try to form it.
*
*
13. Cover the 4 logs with a kitchen towel and set your timer for 60 min. I also like to set a timer on my phone for 45 min- I do this so I know when to preheat my oven.
DING. it's been 1 hour and you already pre heated the oven to 375 as well as placed the rack in the middle of the oven.
I just want to let you know that you are doing a great job. I know you got this..
*
Take a second baking sheet and cover with a piece of parchment paper and lightly sprinkle cornmeal where you will place the bread (if you don't have parchment paper yikes.. You can try to put down corn meal instead but I make no promises as to what will happen to the bottom of your bread. Plus you worked your ass off to get here so make sure you have the paper.
* you should also cut the tops of the bread I generally do 3 or 4. It gives the finished bread a classic look and also helps to hold the butter you are going to slather over the loaf in 20 min.
*
*
Place ONE bread on the baking sheet and place in the oven. Set a timer for 20 min.
Before you close the door spray water into the over. If you do not have a sprayer use ice cubes.
This will create steam and do more science stuff. (it helps with the crust is all but it is critical to getting it right)
Once the timer goes off take the bread out of the oven and lather it with melted butter.. Now place back in the over for 12 more min. Spray more water before you close the oven door!!
*
*
Once complete take the loaf from the baking sheet and place on a rack to cool. I normally leave it for 5 min or so before I cut in and taste a slice.
*
*
You will need to repeat this for all four loaves of bread. DO NOT TRY TO COOK MORE THEN ONE AT A TIME UNLESS YOU HAVE A CONVECTION OVEN. EVEN THEN I WOULD NOT DO MORE THEN 2 AT A TIME AND I WOULD ADD 4 MIN TO THE END.
If this isn't good you messed up. Not sure how you messed up but you did. And if you did I would like you to go sit in the corner like baby (that's right I put baby in the corner) and think about your life.
But most likely you baked some epic french bread and are all nom nom nom
Food for thought. The bread will go stale in a few days. Why not slice the bread then sprinkle with olive oil and garlic and toast them. You can keep them in a zip-lock bag and have snacks for weeks.
*
Looking for a dip mhmm? Like clams? Well stay tuned for my clam sauce recipe, yeah its boss and mindless….
*
*
Hope you had fun and make sure to send me pics of your messy kitchen and the finished product
If you are really having issues making the bread DM me and i'll walk you through it
Blue skies
*
Smile, Life is amazing
Brian
]]>